Project data
2.1 What is a Subject? What is a Subject Set?
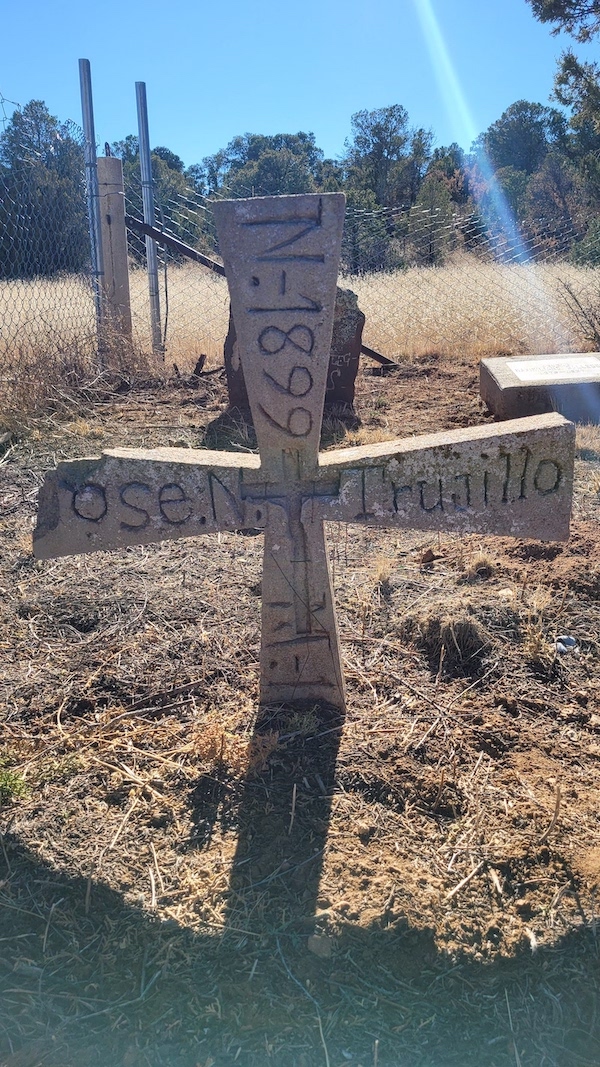
Above: A subject from The Gravestone Project. Photo taken by Rebecca Schneider on December 10, 2022, in Watrous Cemetery near Watrous, NM.
In Zooniverse parlance, a Subject is a unit of data to be analyzed. For transcription projects, Subjects are images of the text you want your volunteers to transcribe. A single Subject can include more than one image. For example, multi-image Subjects can group pages from the same letter or group pairs of images that are known to be the front and back of a single sheet of paper.
A Subject Set consists of a group of Subjects (the images) as well as a Manifest (a list of the Subjects and their metadata). You can put all the Subjects in your project into a single Subject Set, or you may choose to break up your data into multiple Subject Sets. You can ask volunteers to perform the same actions on all Subject Sets, or you can assign different actions for each Subject Set, making it an effective way to produce different types of data.
Creating multiple Subject Sets allows you to group your Subjects appropriately for any particular nuance of partitioning that may be useful in your Subject analysis or to create a better volunteer experience. You may choose, for example, to create Subject Sets based on the date of creation, the structure of the data output, or the data source. In one instance, you may choose to group a set of related images—such as all the images from one archival folder or manuscript volume (dozens to hundreds of pages)—together in a Subject Set.
Transcription projects often have natural divisions that make for convenient Subject Sets based on the organization of the material in archives or libraries. However, you can choose not to subdivide into Subject Sets based on those divisions if it makes more sense for your project. If a Subject Set contains images from multiple archival folders or manuscript volumes, your image naming conventions can still indicate these distinctions, or you can include this information in the Subject metadata, to enable you to maintain the connection back to the archival organization.
2.1.1 What makes a good dataset for crowdsourced transcription?
2.1.1.1 Content
Content should be the driving force in your choice of material to transcribe. Here are a few things to think about when choosing datasets:
- How do the Subjects relate to one another?
- What is the unit of Subject: a single image? Multiple images (e.g. a multi-page letter)?
- Can longer Subjects be separated in a way that will ease volunteer work without removing crucial context?
- Can Subjects be divided meaningfully to alleviate unnecessary steps in analysis later on?
2.1.1.2 Data management planning
A data management plan is a document that outlines how you intend to organize and maintain all data related to your research. You can create a data management plan using a template tool like DMPTool. Keep your data management plan in mind when identifying potential transcription project datasets. How does the organizational structure of your data help or hinder your plans for data analysis and quality control?
2.1.1.3 Image quality
Zooniverse sets a strict per-image upper limit of 1MB. In practice, it is best to start out with the best image quality for your Subjects and then manipulate images to meet requirements through standard image processing techniques (ImageMagick, Adobe, also a free-to-use processing notebook utilizing ImageMagick and Google Drive). Subjects must be in the appropriate file format (see the upload box in the Subject Sets tab of the Project Builder for a list of acceptable file types). Each user, by default, can upload 10,000 Subjects to the Zooniverse platform; this limit can be increased upon request by following the instructions (here)[https://www.zooniverse.org/about/contact].
If you are creating your own images you can find further information about digital image creation in Appendix B of “Breathing new life into death certificates” (Bailey, Leonard, Price et al.).
2.2 Where will your data come from?
This section will provide information on identifying appropriate datasets for use in crowdsourced text transcription projects.
2.2.1 How to source project datasets
Transitioning from a specific research interest to a dataset and project environment that is conducive to crowdsourcing can seem like a daunting task. As a project creator, you may source your datasets from one or more archives, libraries, museums, and other institutions, as well as materials you have digitized yourself.
The digital images created by or at cultural institutions are generally suitable for use in Zooniverse projects, provided you have the right to use them (see 2.2.2 Copyright concerns). You may need to do some preprocessing to make your images the right size for the Zooniverse requirements (see 2.2.1.3 Image quality).
If there are no digital images of the handwriting you are interested in, you will need to create your own images. There are many factors to consider in undertaking this work. See the supplemental appendix of this article on creating images for handwriting recognition, for which similar considerations apply.
Case Study: Sourcing subjects for The Gravestone Project
The Gravestone Project (TGP) is a digital humanities collective that brings people together to think about the various ways that people memorialize the dead. As part of the BCCCT cohort, The Gravestone Project developed a Zooniverse project to record and transcribe gravestones. However, sourcing these images presented both unique challenges and opportunities.
Rebecca Schneider, Associate Director:
“There are several institutions, like Find-a-Grave, where we could have sourced subjects from. The crowdsourced transcription, that’s really thrilling. I’m almost more thrilled by the crowd. That’s a huge labor question solved, but I'm personally more excited about the submission of subjects. Because like you said, that means someone’s standing in a graveyard. To me, that’s the benefit or the contribution of physically being there on the ground, reading a gravestone and taking a photo.”
Amy Giroux, Digital Historian & Technical Lead:
“The memorialization of the people is important. You know, holding that space. The other question that always pops up is we need to have them… say that they’re not relinquishing their copyrights to that image, but we’re allowed to use it. That was another ethical piece—we can't just pilfer a picture. We have to make that effort to go out and obtain permission to use it. And like you said, at the institutional level, it’s a little different thing, you’ve got to have a repository or whatever, it’s more of a legal thing that you have to deal with. But in our case, it’s morally important.”
Rebecca Schneider:
“For me it’s also that feeling of being in community with those people. It’s sharing this interest, but also this commitment to … commemoration and memorialization. This is truly a collective effort. And we might be putting the most hours into conceiving of the structure and the database and all that, but it wouldn't be what it is without the subjects and if it was just [our team], like even that many people can’t achieve coverage.”
2.2.2 Copyright concerns
Copyright issues can be a significant source of delays in bringing text transcription projects to the public. The original handwritten materials you seek to have transcribed may be the property of an archive, library, or museum who received it from another party. The images themselves may have been created by yet another entity. In short, copyright issues with handwritten material can be complicated. Some common copyright situations transcription projects encounter include:
- Material held by a government agency, and the images were created by the government. Often publicly available upon request.
- Material held by a government agency, but the images were created by private entities (e.g. Ancestry). May not be available for transcription, even if viewable on government websites or freely viewable on the private entities website.
- Material created by private individuals, and held by a university, library, private archive, museum or scholarly society have highly variable usage rights. Policies may differ at the collection level within an institution, if the content creator or donor has placed usage restrictions on the material.
You are responsible for determining whether you have the right to use images in a Zooniverse project. Directly asking the institution(s) who hold the material or images whether you can place the material on Zooniverse is the most straightforward way to proceed. You may need to enter into an agreement with the institution to place them on Zooniverse. Zooniverse policy is that you should be sure of your rights to use the images before you make a project public. It is a Zooniverse requirement that you make the data created in your project public. The transcriptions created by your project may be useful data for the institution holding the original images or manuscript material, and offering to share back the resultant transcriptions with the holding institution can sometimes make it easier to get permission to use images.
If you do not have permission to share images publicly, you will need to consider whether Zooniverse is the appropriate platform for your project.
Roger Panetta, Project Director, Shadows on Stone:
“In those incidents where you are working with archival material or collection, be certain about the copyright clearance and the mechanics of the transfer to the Zooniverse site. The presence of private profit-making intermediaries can complicate this process. Do not despair! You can find workarounds and multiple tasks when such impasses occur.”
2.3 How do I get my data into Zooniverse?
Before you can start building Workflows and iterating your project design, you first need to upload some data to the project. We strongly recommend that you begin by uploading a small subset of your data for use in workflow building and testing. This helps reduce the risk of needing to re-upload large amounts of data.
This section will provide you with information on uploading data to the Zooniverse, adding metadata to the Subjects in your project, creating data Manifests, and the circumstances which require specific information to be included in your Manifest to support specific project features.
2.3.1 How to upload
This section will cover simple and more complex methods of uploading data to your Zooniverse project.
2.3.1.1 Simple upload
This section describes how to use the simple method to upload data with or without metadata.
2.3.1.1.1 Simple upload: without metadata
If every Subject you want transcribed is a single image, and if the image file name contains enough information for you to be able to precisely match the Subject to your data export later, then this is pretty easy: you can just drag and drop the images into the Subject Uploader (or click on the ‘Upload Subjects’ box and select images via your file browser). Please note that, when using the simple uploader, we recommend uploading your data in batches of no more than 1,000 at a time.
2.3.1.1.2 Simple upload: with metadata
Simple subject upload: with metadata By using a Manifest, you can associate related metadata with each image you plan to upload to your project. Above, you can find more information about creating a Manifest, but for now we will assume the Manifest is created and your files are ready.
Project creators often find it easiest to have all of their Subject images in a single folder along with their Manifest CSV file; you must upload both at the same time. However you organize your files, pay attention to the details and keep careful records, as it may be important for your data analysis later (e.g. when you download your data exports and need to link those back to the rest of your metadata).
Click on the ‘Upload Subjects’ box and navigate to the folder where you are keeping your images and Manifest CSV file. The easiest thing to do is to select everything in that folder (hit cmd + a on Mac, or ctrl + a on Windows) and click “open” to upload those images and the Manifest file. The project uploader gives you a preview, to indicate the number of Subjects that are ready for upload. If there is a problem with any of your files, or with your Manifest, the preview will indicate the number of files that, for whatever reason, have failed to be created. If this is the case, you will need to troubleshoot before continuing with the upload process.
Click ‘Upload’ to start the process. When everything is uploaded, you will see a list of all of the Subjects you have created. The numbers to the left are unique identifiers for each Subject (also called Zooniverse IDs), and the icons to the right let you preview or delete each Subject. When previewing a subject, you can also view its metadata by clicking on the icon below the image shaped like the letter ‘i’. Please note that, when using the simple uploader, we recommend uploading your data in batches of no more than 1,000 at a time.
2.3.1.2 Command-line interface + Python client
For teams with more than 1,000 Subjects to upload, the simple (web client) uploading method is not ideal. Zooniverse provides support for batch uploading through a command-line interface (CLI) and a Python library. Both methods offer the same functionality and are officially supported by Zooniverse. Command-line-interface documentation can be found here and Python documentation can be found here.
2.3.2 Manifests and metadata
This section provides detailed information on how to include metadata in your Subject upload.
2.3.2.1 Why should I include metadata with my Subjects?
There are no requirements for uploading metadata to Zooniverse. You can include as much or as little metadata as you like. Much of the time, though, project creators want to keep some data associated with their images in the Classification interface. For example, if the images you are using need to be displayed with a license, that information can be included with the data you upload to the Project Builder, and viewed by volunteers by clicking on the Subject Info button (the small ‘i’) in the project Classification interface.
Additional information that can be helpful for volunteers while Classifying (if available) might include: * Attribution/authorship * Date created * Location or other geographic information * URL to view the collections record, and/or high-resolution image * Archival reference of the material
Some of this information may not be available for your dataset—generating it may even be a goal of your project. However, if you do have metadata for your images, it can be useful for volunteers for several reasons. First, it can sometimes help with transcription. For example, if your project works with letters and the holding institution has already cataloged the date and information about the writer and addressee, that can be a helpful resource for volunteers trying to decipher possibly difficult signatures. Including the URL to a full catalog record in your Subject metadata can support volunteers who may be interested in learning more about a particular document or its content.
2.3.2.2 What is a Manifest
A Manifest is a file that allows the Zooniverse platform to associate metadata with the images you upload to the Project Builder. Your Manifest must be formatted as a CSV (“comma separated values”) file in order to work properly. Each Subject Set you upload must have its own Manifest.
Each row of the CSV file should contain information about a single Subject that you’re uploading to your project. The first row should include your headers (variable or column names). So, if you’re uploading a set of 100 Subjects and want to include their metadata, your CSV should contain 101 rows.
The first column in your table should contain the image filename. This is how the Manifest finds the relevant images in your upload in order to assign the metadata appropriately. If there are filenames in your Manifest that do not correspond to an image file upon upload, it will cause an error. Similarly, if there is a file in your dataset that is not included in your Manifest, it will also cause an error. To avoid errors, double check to be sure the list of image filenames in your Manifest CSV exactly matches the filenames of the images you want to upload. We recommend that you avoid using special characters unless they have a specific use case, e.g. using # in front of a column heading to hide that information on the project front end.
2.3.2.3 Special features
Certain features of the Zooniverse platform require you to include specific information in your Manifest. The examples below will walk you through the information you need to include in your Manifest to support these features, including links to example Manifests.
2.3.2.3.1 ALICE
ALICE stands for Aggregate Line Inspector and Collaborative Editor. It acts as a means for reviewing aggregations of your volunteers’ transcriptions at a line-by-line level through a graphical user interface (see figure; for more information see, section 7). Please read through the ALICE About page for more information on setting up your project for use with ALICE.
If you are planning to use ALICE, you must include an internal_id field in your Manifest. This ensures you’ll be able to view and search for an image/item in ALICE by your institutional reference instead of the auto-generated Zooniverse ID. Avoid special characters and spaces.
If you are planning to use ALICE, you must also include a group_id field in your Manifest. This ensures you'll be able to view and export smaller groups of images instead of sending all your transcription data to the same ALICE folder. We recommend that you use the same groupings as you do for your Subject Sets in the Project Builder. Avoid special characters and spaces. Note: the group_id field will have no bearing on how data is presented to volunteers in your Zooniverse project, it will only impact how you view transcription data in ALICE.
For teams using ALICE, we recommended that you limit your group sizes (and thereby also Subject Set sizes) to under 100 images. This reduces the risk of timeout issues during the data export process.
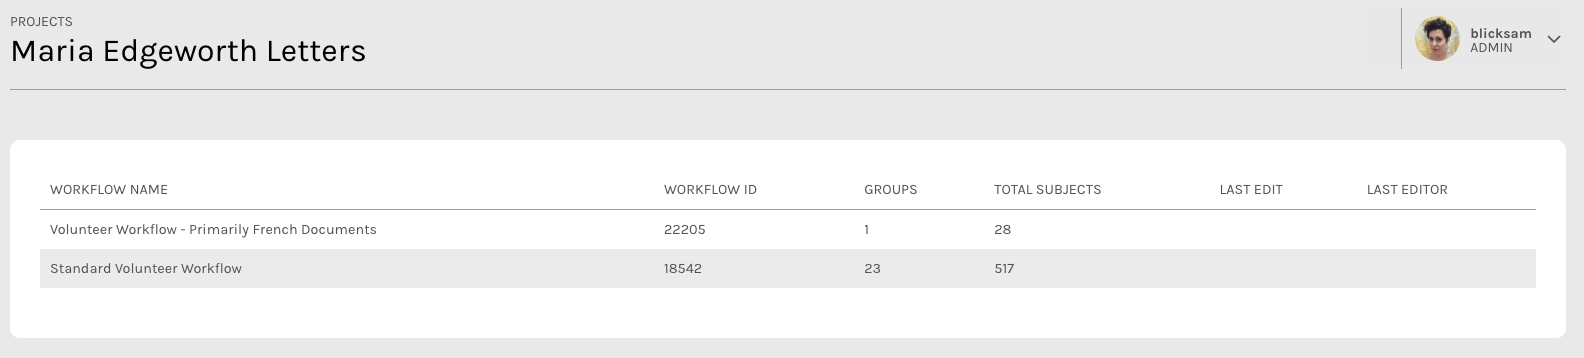 Above: A screenshot of the Workflow View for Maria Edgeworth Letters, Co-PI Hilary Havens.
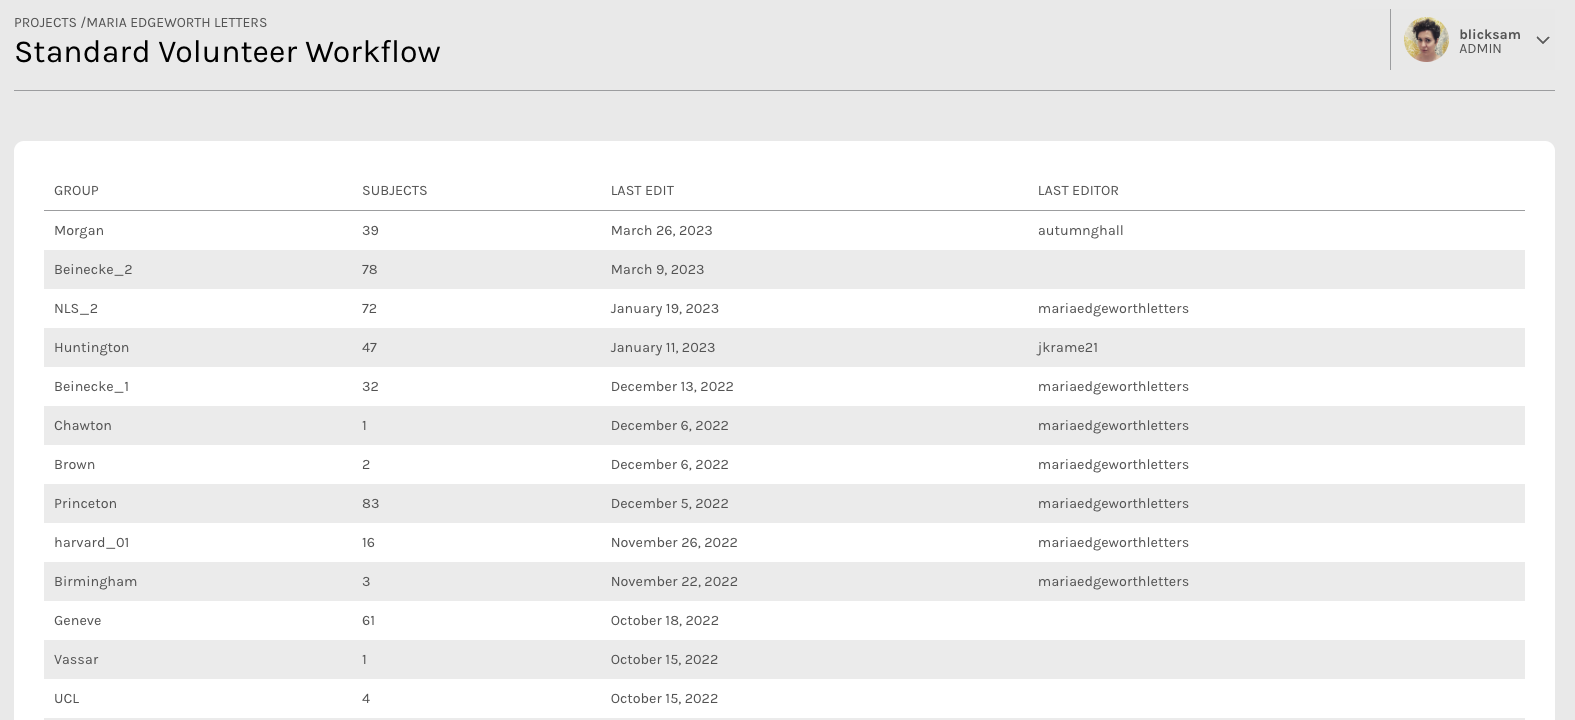 Above: A screenshot of the Group View for Maria Edgeworth Letters, Co-PI Hilary Havens.
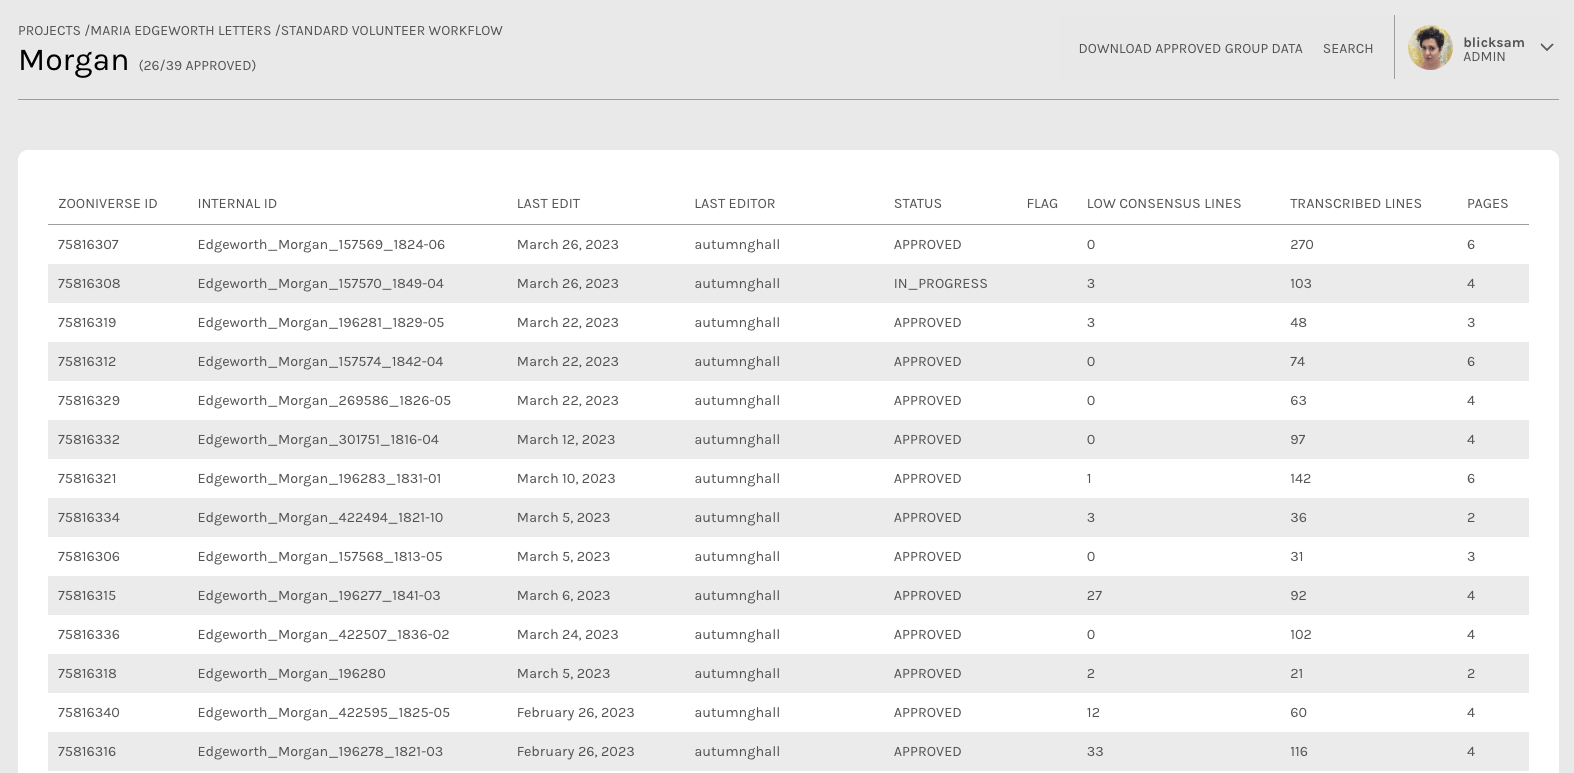 Above: A screenshot of the Subject View for Maria Edgeworth Letters, Co-PI Hilary Havens.
2.3.2.3.2 Sequential Classification
This feature will present the Subjects in a given set to your volunteers in the order you establish within your Manifest. You must add a #priority field to your Manifest if you want volunteers to be able to classify Subjects in sequence. The contents of this field must be integers.
To complete setup, once you’ve uploaded your data with the required field, you must send an email to contact@zooniverse.org requesting that Sequential Classification be turned on for all applicable workflows. Please include your project ID number as well as the ID number of all the Workflow(s) you want set up for Sequential Classification.
2.3.2.3.3 Multi-image Subjects
Multi-image Subjects offer an alternative to Sequential Classification by presenting a group of related images as a single Subject. This option is particularly helpful for teams who are working with data that has existing sub-relationships within a given Subject Set, such as letters.
The number of image fields you need to include in your Manifest depends on the maximum number of images a Subject in a given set may have. If other Subjects in the set do not have the same number of images, leave those fields blank (e.g. if one Subject only consists of a single image but others in the Subject Set consist of five images, include the image name in the first field in that row, and leave the other four blank).
2.3.2.3.4 Indexed Subjects
Indexed Subjects allow volunteers to choose an individual Subject from a list and work through a Subject Set in sequential order (nb: Sequential Classification is required for teams who want Indexed Subjects). This option is helpful for teams who have useful metadata already available for their Subjects, and who think their volunteer communities will want to choose what they want to transcribe. Examples might include volunteers who want to find a particular author’s work within a collection, or documents from a particular year.
To indicate which metadata fields should appear in the index, simply put a % in front of the heading of the column you want to include. To learn more about Indexed Subjects, read this blog post.
2.3.2.4 Resources for creating Subject Sets and Manifests
Scripts
Multi-Image Manifest generator (Python Script)
Manifest examples (Google Sheets - view only)
ALICE + Sequential Classification
Indexing + ALICE + Sequential Classification
Indexing + Sequential Classification
2.3.3 Breaking down your data into different Subject Sets
This section provides guidance on how to organize your dataset into smaller Subject Sets before uploading these sets into your project.
2.3.3.1 Relating data to Tasks
Most often, your data will dictate the kind of Task or Workflow structure that should be created for your project. When designing Workflows, keep in mind:
- Your research interest
- Usability (from a volunteer perspective)
For transcription projects, a useful default for organizing Subject Sets is to mimic or slightly adapt the original archival or manuscript structure of the handwritten material. This could mean grouping by year, author, topic, etc. For example, your image collection may include 1,000 manuscript pages from an archival collection, originally held in two boxes with 10 folders each. In this example, you could break this dataset down into two Subject Sets (i.e. one for each box) or 20 (i.e. one for each folder).
If all the pages have a similar structure and layout you can send them all through the same transcription Workflow. If the pages vary widely, you may need to create different Workflows to facilitate capturing the page layout and content (e.g. registers will require a different transcription approach than diaries).
Depending on the types of information you want to extract from an image you may have multiple Workflows that connect to the same set of images. For example, an initial Workflow asking volunteers to classify an image by document type can be helpful for breaking down a large dataset into smaller Subject Sets, each with its own specific Workflow. Because document type recognition can rely on relatively coarse distinctions between images, this may be a task you can experiment with using computer recognition for.
Workflows can be connected with as many Subject Sets as you like, depending on the volume of data you want to have transcribed. For example, you may choose to launch the project with your entire dataset linked to a single transcription Workflow, or start with a subset of your total data, and ‘release’ more Subject Sets as others are completed.
Because transcription work can proceed quite slowly, transcription projects benefit from having many smaller Subject Sets, rather than fewer large Subject Sets. By organizing your material in this way, you are more likely to obtain complete transcriptions of related material sooner. Returning to a previous example, if you broke up the set of 1,000 images into two groups of 500 Subjects, it would take a long time for each to be completed. If you broke up the set of 1,000 images into 20 folders with 50 Subjects each, the small groups would be completed more quickly, especially if you released the data in stages.
This type of Subject Set creation also ensures that volunteers will also encounter related material as they transcribe, which may increase engagement and retention.
2.3.3.2 Subject Set selection
If you want your Subject Sets to remain separate (i.e. you don’t want to group them all together within the same Workflow), you may want to consider using Subject Set Selection. This is a platform feature that allows you to let volunteers choose what Subject Set to work on within a single Workflow. If you have a single transcription Workflow that has multiple Subject Sets associated with it, simply send an email to contact@zooniverse.org with your Project ID and the relevant Workflow ID, and we can turn this on for you. If you are using this feature, please note that the maximum number of subject sets you can associate with a single workflow is 50. If you go over this number, additional subject sets will not be displayed.
Case Study: The ins and outs of creating Subject Sets
Poets & Lovers is a project to transcribe the diary of 'Michael Field' created by two women poets, Katharine Harris Bradley and Edith Emma Cooper.
Peter Logan, Principal Investigator:
“Identifying and preparing subject sets is probably the most time-consuming task in building your project, and you want to do it right the first time, if possible, so go slowly. Below are some tips for thinking through the process.
- Type your subjects. For example, pages with tabular data might be one type, prose pages another, audio-visual data a third.
- Look for subtypes within each group. One of the most useful lessons I learned was to separate multi-page subjects, like correspondence, from subjects that could be treated as individual pages. In my case, those were diary pages. This led to the creation of two workflows, one that was tailored to multipage subjects, where keeping the images in order mattered (who was writing and to whom?), and a second designed for single diary pages (where we know that context).
- Note: Even the latter can be served up more or less consecutively, using a priority column in your manifest, but once subject #1 is completed and removed, volunteers will not be able to access it before transcribing subject #2.
- Establish the ideal quantity for subject sets. With your basic types established, think about how many images to include in each subject set. I made my sets too large initially and learned that volunteers like to work toward a goal, such as contributing to completing a set, so you want a quantity that scales to that imagination, and not one so large that each day’s work is an unrewarding drop in an oversized bucket.
- Remove unneeded images. We had images of blank pages in our comprehensive collection, for example. It sounds obvious, but images that do not need transcription should be removed.
- Optimize your images. It pays to have someone on your team who knows how to modify images, since volunteers cannot transcribe what they cannot read.
- Which image dimensions best filled an average screen in the Zooniverse format? 900 x 400 worked well.
- Which level of compression reduced file size the most while retaining high resolution when enlarged? For JPEG files, 65% showed no deterioration when enlarged on a big monitor.
- Create your manifest. You can build in whatever program you want, but it has to be saved as CSV. (We learned the hard way that Zooniverse will not accept a manifest in Excel’s spreadsheet format, .XSLX.) This was an easy process, but consider what data you want to share with volunteers. Extra columns in your manifest are visible to users, unless you hide them with a hashtag. We wanted to include a link to the original images in an external archive, for example. It now appears in the information window for the image, along with other relevant data, like the date and volume it came from.
2.3.4 When should I upload my Subject Sets into Zooniverse?
Start by uploading a small dataset (<50 Subjects), to use for building and testing Workflows. You do not need to have all your Subjects before you get started. Starting with a fraction of your total dataset allows you to experiment with different aspects of your project—remember, your Workflow design should influence how you break your full dataset into Subject Sets. in the Subject Set you use for building and testing your Workflows, you should include examples of the different formats and layouts volunteers can encounter when working through your full dataset. A full data upload should be the final thing you do before your project launches.
2.3.5 Beta testing Subject Sets
Beta testing requires a small Subject Set. For most projects, this is usually between 150 and 300 Subjects. For projects using the Transcription Task, it is usually about 25 Subjects. Beta tests last for one week, so the aim is to include enough data to last more than a few days, but not so much that nothing is retired by the end of the week-long test. The goal of beta testing is to validate the results from your Workflow(s), while also verifying that volunteer expectations are clear throughout the project and the user experience is positive.